The quick answer
Right sustains all; middle holds selected notes; left softens
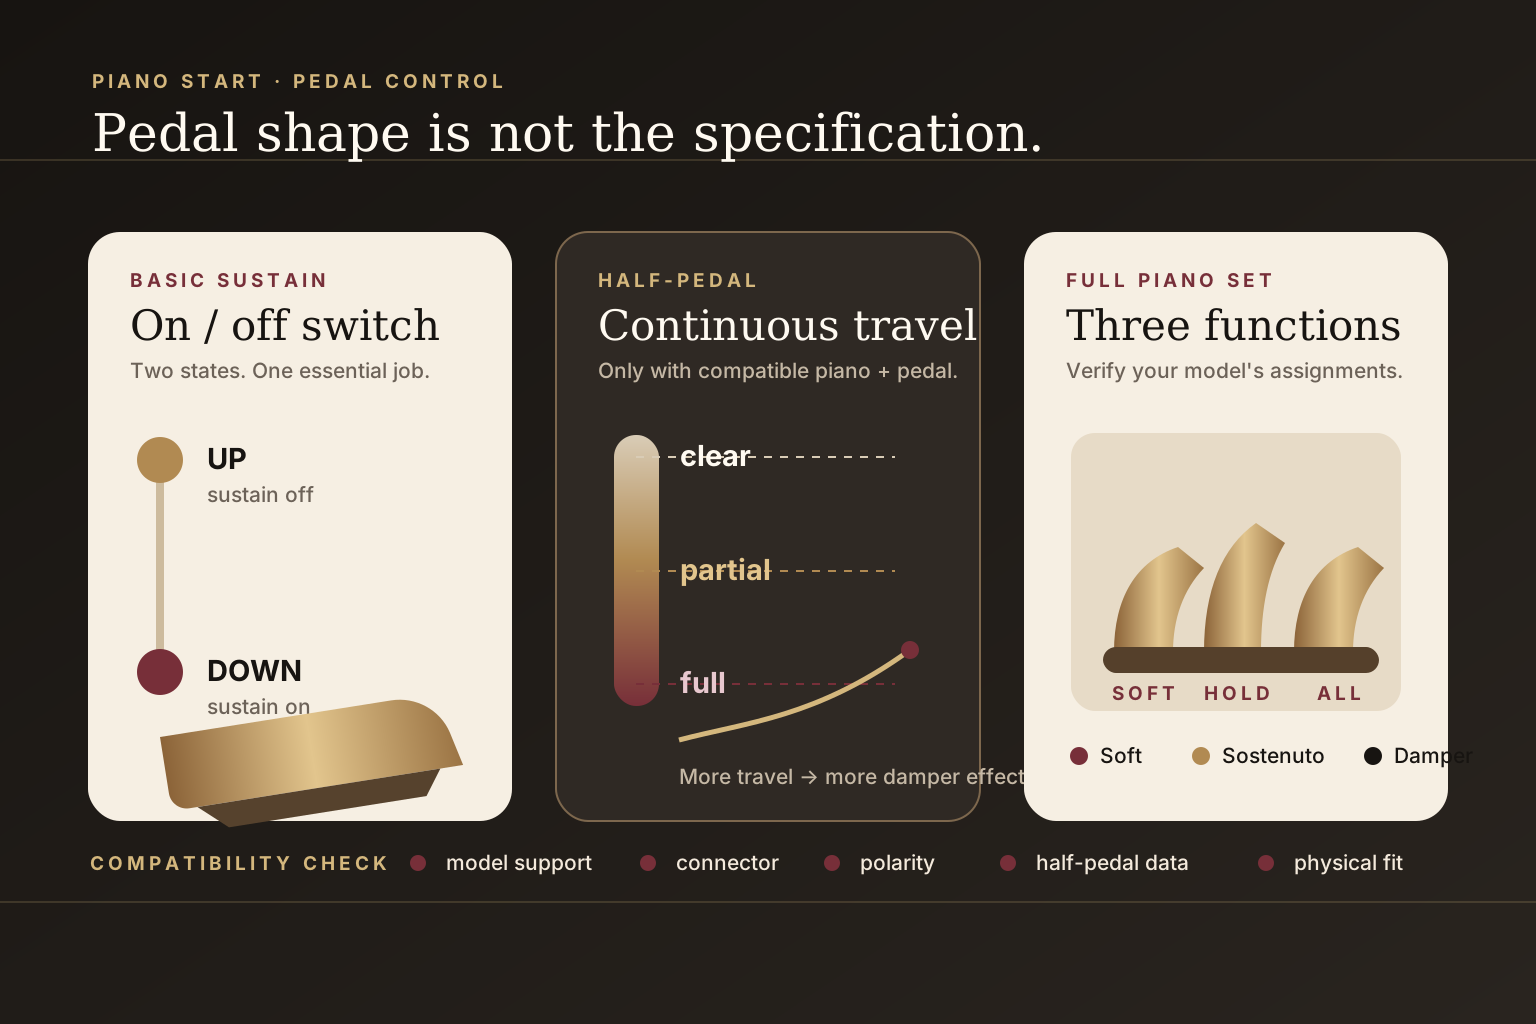
On a grand-piano-style three-pedal layout, the pedals have distinct musical jobs. Digital pianos usually imitate these roles, but manufacturers may allow reassignment and upright-piano conventions can differ—especially for the middle pedal. Check the selected voice and manual.
Damper / sustain
Notes continue after the keys are released. This is the essential pedal for early repertoire and the one most portable pianos include.
First prioritySostenuto
Notes already held when the pedal is pressed continue, while later notes remain unaffected. It appears in selected repertoire, not every beginner piece.
Selective holdSoft
The effect reduces volume and may alter timbre. A digital recreation does not mechanically shift an action like an acoustic grand.
Color and controlYamaha's acoustic-piano guide distinguishes the grand's sostenuto pedal from the muffler or practice pedal often placed in the middle on an upright. A digital three-pedal unit normally follows the functions stated in that model's manual, not merely the furniture style it resembles.
Technique before hardware
Use sustain to connect sound, not cover the hands
The damper pedal enriches resonance and connects notes that the fingers cannot physically hold together. It can also blur every harmony if it remains down through a chord change.
- 01Play the new harmony first.
Let the fingers establish the next note or chord before making the pedal change.
- 02Lift and return promptly.
Release the old resonance, then depress the pedal again while the keys are still held. The exact timing varies with tempo, room, instrument response, and musical style.
- 03Listen from the bass upward.
Low notes create mud quickly. Practice slowly without pedal, then add it while listening for the instant harmony loses clarity.
- 04Keep the heel supported.
Place the ball of the foot on the pedal and use a controlled ankle movement. A pedal that slides away prevents repeatable technique.
A useful practice rule
If removing the pedal makes the phrase collapse, repair the fingering and legato first. Pedal should shape a controlled performance, not hide one.
Switch vs continuous control
Half-pedaling is a capability, not a pedal position
A basic footswitch reports two states: up or down. A compatible continuous damper pedal can report travel between those extremes, allowing the digital piano to vary how much sustain or damper effect it applies. Yamaha defines half-pedaling as changing the amount of sustain by changing how far the damper pedal is depressed.
Simple and sufficient to start
It triggers sustain without intermediate levels. Choose a piano-style shape with a non-slip base when possible; stability changes daily usability more than cosmetic realism.
More precise decay control
It supports partial pedal travel only when the piano interprets that continuous signal. This becomes valuable as repertoire and listening skill demand cleaner resonance.
Buying a half-pedal-capable accessory does not add half-pedaling to an unsupported instrument. The input circuitry, software, plug wiring, and pedal must be compatible as a system. A three-pedal unit may also depend on a matching stand or proprietary multi-pin connection.
The part buyers miss
Match function, connector, polarity, and model support
A quarter-inch plug can hide different electrical behavior. Some pedals are simple momentary switches; some provide continuous control; some use a polarity opposite to what an instrument expects. Three-pedal assemblies can use proprietary connectors and physical mounting points.
| Check | Question to answer | Where to verify |
|---|---|---|
| Exact compatibility | Does the manufacturer list this pedal for this piano model? | Piano accessory page and both manuals |
| Function | Switch sustain, continuous half-pedal, or three separate pedals? | Specifications, not product shape |
| Connector | TS, TRS, multi-pin, or another documented plug? | Rear-panel label and manual diagram |
| Polarity / detection | Must the pedal be connected before power-on, or can polarity be changed? | Setup instructions for the exact model |
| Physical fit | Will the pedal stay put, and does the triple unit require a matching stand? | Dimensions and accessory notes |
If sustain works backwards—notes hold with the pedal up and stop when pressed—switch the piano off and follow its documented startup procedure. Do not assume every polarity switch or adapter is safe for every jack. The clean solution is a listed compatible pedal.
A staged upgrade
Choose the least complicated setup that supports the music
- New beginnerStart with one dependable sustain pedal on a stable floor surface. Learn clean pedal changes before paying for functions the music does not yet use.
- Lesson-focused pianistChoose half-pedal support when the teacher introduces controlled damper depth or the repertoire benefits from more nuanced resonance.
- Classical or exam pathwayA compatible three-pedal unit removes a future equipment gap and creates consistent foot spacing, provided the stand and bench remain stable.
- Portable or stage setupA solid single damper pedal travels easily. Secure the cable and use a non-slip mat or pedalboard so the pedal returns to the same place.
- DAW and software-piano workflowConfirm the software receives the intended pedal data. A hardware sound responding correctly does not prove the MIDI recording captured continuous values.
A realistic pedal cannot compensate for a poor key action or unstable stand. If you are choosing the instrument at the same time, prioritize the touch decision in the weighted key-action guide, then budget for the correct pedal and bench.
When you record MIDI
Make sure the performance keeps its pedal information
In MIDI 1.0, the standard control-change assignments identify damper as CC64, sostenuto as CC66, and soft pedal as CC67. The MIDI Association's reference describes the conventional on/off threshold for CC64. Continuous or higher-resolution behavior depends on the instrument, protocol, software, and recorded data.
Ten-second recording test
- Record a chord, press sustain, and release the keys.
- Lift the pedal, stop, and play the clip back through a software piano.
- Open the controller lane and confirm the pedal event appears at the intended time.
- If testing half-pedal, look for changing values—not only two states—and listen through a sound engine that supports the behavior.
MIDI gives you the freedom to edit a late pedal event, but it can also expose a routing mistake. If you need help separating MIDI data from the piano's actual sound, use the digital-piano connection guide.
Before the return window closes
Test every pedal slowly and deliberately
Start from silence
Power on according to the manual with the pedal untouched. Play short notes before pressing anything; they should stop normally.
Test sustain across the keyboard
Play bass, middle, and treble notes, then release the keys while holding the pedal. Listen for predictable sustain and a clean stop when the pedal lifts.
Test partial travel if supported
Compare shallow and full depression. The change should be controllable, not merely a delayed on/off switch. Use the instrument's half-pedal calibration if its manual provides one.
Test the other two functions
For sostenuto, hold selected notes before pressing, then play new notes. For soft, compare notes played after engaging the pedal with the same passage unpedaled.
Check the physical setup
Press firmly without chasing the pedal across the floor. Inspect cable strain, connector seating, and clearance around the stand.
Repeat this test while the return period is open. An early compatibility problem is easier to solve than a technique habit built around an unreliable pedal.
Primary references
Technical details worth verifying
Primary and manufacturer documentation is linked for the technical claims used in this guide. Product support, accessories, and regional specifications can change.
Clear answers
Frequently asked questions
01Do beginners need three pedals on a digital piano?
No. A stable sustain pedal covers the essential early function. A compatible three-pedal unit becomes useful for repertoire that calls for sostenuto or soft pedal, for a fixed console-like setup, or when you want to avoid a later upgrade.
02What is the difference between sustain and half-pedaling?
A basic sustain switch is on or off. Half-pedaling lets a compatible piano vary the damper effect according to partial pedal travel, giving finer control over resonance and decay.
03Will any sustain pedal work with any digital piano?
No. Plug size alone does not guarantee compatible polarity, switching, continuous control, wiring, or model support. Use the piano maker's compatibility list and the manuals for both products.
04Why is my sustain pedal working backwards?
The instrument may have detected the opposite switch polarity, often because the pedal was held during startup or connected in the wrong sequence. Switch off and follow the exact manual; replace it with a listed compatible pedal if the problem remains.
05Can a sustain pedal be recorded over MIDI?
Yes. Standard MIDI commonly represents damper with control change 64, while sostenuto and soft use other assigned controls. Confirm your piano sends the data, the app records it, and the playback instrument interprets it as intended.